
On-line since 2002
> 600
pages
> 1150 manufacturers
> 11000
pictures
> 1.000.000 unique visitors
![]()
![]()
![]()
![]()
![]()
![]()
![]()
![]()
![]()
![]()
![]()
![]()
![]()
![]()
![]()
![]()
![]()
87thScale.info does not
spam. If you received a
spam message with an 87thScale return mail
address it is forged.

How to make an 87th scale Formula 1
model
Text & pictures © Olivier Gourhan
How to make an 87th scale Formula 1 model ? First of all, you need fingers. You think I am joking ? Well, practice makes perfect. And just like the football player practices every day, the accountant counts and recounts, the teacher prepares his class and the businessman reviews his files, the one who wants to create needs his/her fingers. Thin or fat fingers ? Long or thin fingers ? Who cares, the most important is to have good fingers.
You also need Time and Passion and Goal and Peace and Space and Patience and Time. Time to get ready, to prepare your stuff and to find ideas and new materials or ways of doing. Passion for what you are doing and to stay focused on your goal. Goal to stay on the right path during the different processes of the creation. Peace and quiet in yourself and around you to stay calm and serene. Space around you to organize your working space well and efficiently. Patience to do, redo, reredo and rereredo until you make the right cut. Time to be free and to be with yourself for dreaming, thinking, creating and making.
For a more technical point of view, I use:
- Sheets of 1, 2 or 5 mm thick soft acrylic, easy to cut, with some bubbles inside. (Just avoid the bubbles)
- Plastic cover pages of notebooks: yellow or transparent.
- Cutter, penknife, super glue
Some advice for beginners:
- If you create the prototype, make 2 models at a time and write down a log / feedback after each operation.
Let’s begin by choosing the model you want. Search for data, drawings, blueprints and (the best, of course) paper models which is easy with http://www.google.com/ and http://www.cardfaq.org/faq/ (see section: free models). For Formula 1, a special award goes to Yasu Tanaka: http://www.ne.jp/asahi/paper-m/yasu/0index/e_index.htm. If you wish, you can make his paper models. But watch out though ! Papercraft is a highly addictive and time consuming activity. Don’t forget your goal is to create an 87th scale Formula 1 model.
Here is the goal:
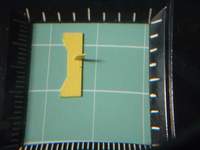
Start by drawing your own blueprints on millimeter paper. What to draw ? First of all, draw the model in 87th scale as accurately as possible. Then, in a second drawing, get rid of the excessive details, (rear view mirrors, fins, barge boards, …) and focus on the main body of the car. Third drawing, not one, but many drawings, actually as many drawings as pieces you want. For example, if the right sidepod is made of 2 pieces, draw these 2 pieces as accurately as possible from each side and specify the dimensions.
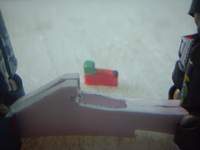
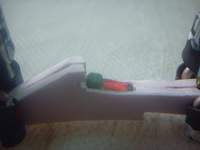
See the photo below. Don’t ask for more details ; ) This is secret and confidential personal data.

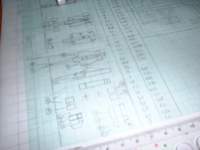
NB: The drawing of the Jordan F1 2000 is available at Yasu Tanaka’s website.
- Remark:
The more details you put into your drawings, the faster and the more efficient you will be during the cutting and assembling.
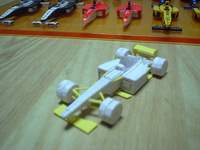
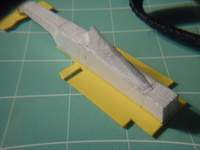
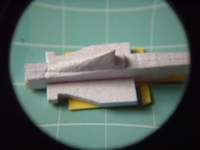
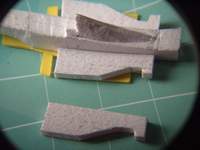
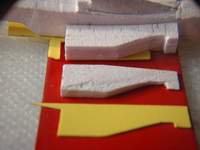
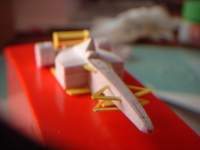
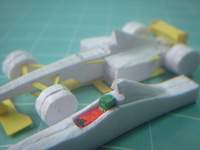
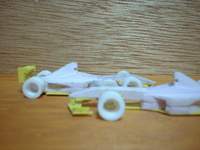
Let’s begin with the monocoque. 2 pieces of 2mm thick sheets of soft acrylic, glued together and cut out along the side template. (It can also be cut out along the side template and glued together). Then cut out, scrub and sand the induction box and the front nose to give the final shape. This needs practice. See the pictures below.
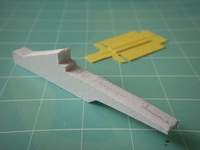
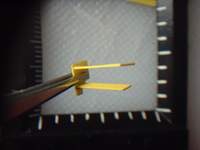
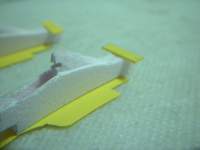
Next is the front wing. Simple. Cut out from the cover page of your favorite notebook (it really begun like this !) and glue the 2 vertical supports with the front wing as shown in the picture.
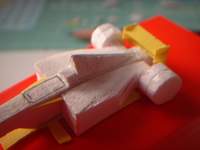
The undertray is cut out from the cover page too. A simple and clean cut. Now first pause and check if these 3 pieces (monocoque, front wing and undertray) fit together. You can see here that the undertray is actually made of 2 layers. The extra piece is supposed to be the wear plank. It is glued onto the main undertray, and will be right on the floor.
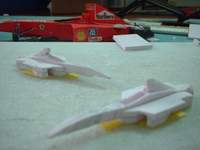
For this model, the sidepods are composed of 4 pieces, 3 are 2mm thick sheets of soft acrylic and 1 is from your cover page. Cut out following your template where 1 and 2 are similar and 3 is different and has been lowered at the back. 4 is also different with this extension along the cockpit. Glue 1, 2, 3 and 4 on top of each other. That’s it.
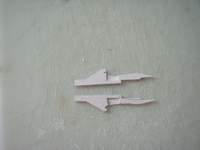
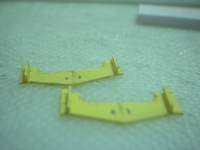
The rear wing is made just like the front wing, using the cover page of your favorite yellow notebook (is there still some left ?). Here, it is made of 4 pieces: 2 vertical supports and 2 horizontal surfaces. Glue it on the gearbox.
The wheels are made of 2 pieces of soft acrylic too. The diameter is 7 millimeters. Draw the circle on the acrylic and cut out roughly, then scrub and sand until it looks circular and smooth. This is a long, exhausting and boring process, so prepare some coffee or tea ! Jump to the extra features further below for a cleaner and easier way of doing this. Glue the wheels on the main body.
- Remark: regarding how you plan to use these models, for play or for display, either (for play) put the main body right on the floor and glue the wheels, or (for display only), position/place a layer of the cover page under the main body and glue the wheels. This last option is obviously the most realistic, because only wheels touch the floor… just like the real ones.
For the Jordan 2000, I chose an intermediate solution where the undertray is actually made of 2 layers. The extra piece is supposed to be the wear plank. It is glued onto the main undertray, and will be right on the floor.
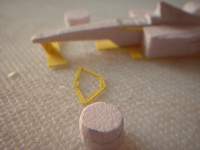
The front suspension is the last piece to make, and the most important is the drawing. A good drawing results in a good looking suspension. The lower suspension is a 1-piece part glued under the monocoque, the upper suspension is a 2-pieces part glued on each side of the monocoque. The front wheels are glued to the suspensions.

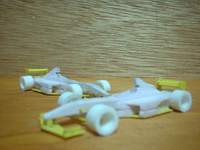
This is the end of this part, the Jordan 2000 was done this way.
The Ferrari 2000 and the McLaren 2000 include other features. First, for the McLaren, the induction box is now made as a seperate piece because that allows more freedom to perfect the details. It is glued on top of the monocoque. (No photo). Then, there is the cockpit, before you glue the 2 pieces of the monocoque together, cut out the cockpit, and include a DIY driver in it. It is a long and delicate process, but it looks pretty cool don't you think ?

Other features:
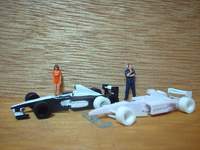
Cut out the inside of the sidepods, so that the sidepods are really empty, just like the real ones. On the outside, thanks to Yasu Tanaka’s paper model, I have been able to perfect the shape of these sidepods. Note the paper Ferrari model in the background, it is also a long and delicate process, but the result is so nice.
Add vertical wings on both edges of the front wing.
Wheels.
Instead of the soft acrylic method described above, you can also use electric wire (diameter 6 to 7mm), cut it out and glue a piece of plastic board on one side. Assemble the whole.
Barge boards are made of thin plastic board. Cut out following the template and glue onto a transparent plastic supports. (No photos). Thin transparent plastic board was used for making the McLaren, this is wonderful for drawing and cutting accurately, but it is a nightmare for all the other reasons, from finding the right position of the tool to catch it to searching the piece on the floor ! You can see the unpainted front wing in the picture below.
Thank you for your attention !
Olivier Gourhan
If there is something you'd like to ask Olivier, you can use the messageboard !