
On-line since 2002
> 600
pages
> 1150 manufacturers
> 11000
pictures
> 1.000.000 unique visitors
![]()
![]()
![]()
![]()
![]()
![]()
![]()
![]()
![]()
![]()
![]()
![]()
![]()
![]()
![]()
![]()
![]()
87thScale.info does not
spam. If you received a
spam message with an 87thScale return mail
address it is forged.

Subtle Changes
A 'tutorial' by Chester Fesmire
All pictures are © Chester Fesmire
I know how I feel when I’ve made an extensive change to a model and the results are what I had wanted to achieve. Hours of work scratch building parts and structuring the model to prototypical design and measurements, not to mention the research needed to work from, is all very gratifying when the results are correct. And even something as simple as a color change can alter a model’s appearance significantly. The huge influx of inexpensive diecast models to our scale leaves the doors wide open for such dramatic alterations. But also, there are often overlooked and very subtle changes we can do that don’t alter the general look of a vehicle but when viewed closely can bring a much greater realism to our models. Granted, at this point one must be working with an already nice quality model to get the best results but these subtle changes can be an improvement even on some of the worst models. So the following are a few minute changes that will produce equally minute but satisfying results. And may be just the finishing touches needed to that model you’ve spent so much time drastically changing.
![]() Lights
Lights
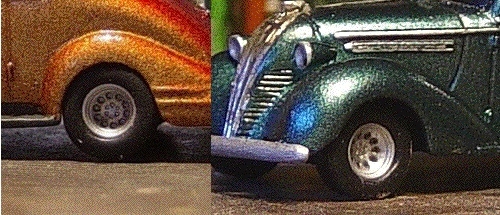
All too often, I view a model with total admiration until I see the front of the vehicles headlights are two bulbous silver buttons. It drives me crazy since the fix is so easy and the difference, so..... different. If a drill bit (or a small round rasp from a Dremel type tool would work also) only slightly smaller than the protrusion, is centered on it and drilled out to where the cut of the bit is to it’s maximum diameter, you should have a neatly concaved opening. I make a center mark with a pin to help start the bit. Obviously this works better in resin and plastic than white metal and the most difficult being diecast but I’ve somehow managed to do it to all of them. After the model is painted and detailing the chrome is being done, silver paint the entire headlight assembly. When dry, apply a drop of wh. glue or Krystal Klear in your concave depression and allow it to convex outwards. I use Sobo craft glue but any of the wh. wood glues or Krystal Klear will work. Not hard or expensive nor does it require any special tools, but the difference is a desirable one.
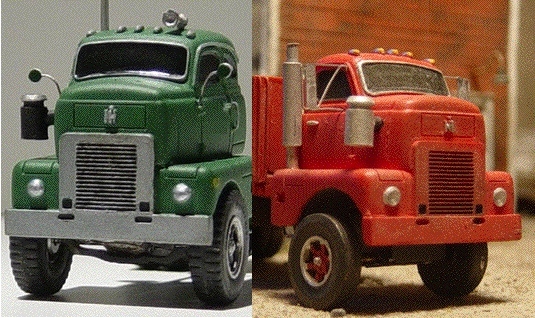
Same truck, different look
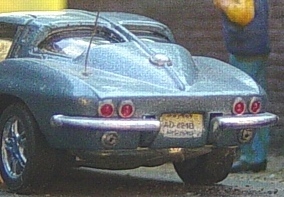
Look closely at your model. Are all the lights painted ? I’ve had some nice looking models that really don’t need much except that the turn signals are the body color or the same to be true of the tail lights. Easiest fix. Carefully paint with silver. Then use a transparent red or yellow and you’ve created a realistic looking lens. I use the acrylic Pactra racing colors for this but there are several manufacturers that have transparent colors. If push comes to shove, food coloring in white wood glue works the same.
![]() Washes
Washes
Doing washes is a scary thought to many since they can be so awful if done wrong and so......well, permanent. Many of the models we see have terrific details that are often not noticed because of the lack of any miniscule shadows. Panel lines, vents and rivets particularly don’t show in photographs because their detail is too small to cast a significant enough shadow to be picked up by the camera under some lights. A wash, applied to these details often highlights them enough to subtly improve the look of a model.
There are two mistakes made most frequently when doing washes. The first is to thin down the wash (if using an acrylic) with water. Use an inexpensive windshield washing fluid or, what I use, Windex. I don’t know the technical verbiage for why but water leaves drippy marks and it is painfully obvious what has been tried. The second mistake is to always choose black. Black panel lines on a white or yellow car are hideous. Choose a color only a few shades darker than the color of the vehicle. I prefer water based paints for this since repairs are easily made while oil based washes are less forgiving (although there are some that achieve terrific results with oils). If panel lines alone are what you wish to do, just load your brush conservatively and allow capillary action to draw the paint up into the recess by touching it at only one point one the line.
While on the subject of washes, turn your attention to the wheels. Now you can go to black and allow the wash to settle in to the depressions in the wheel. Especially on wheels that have holes simulated in them, this will be a big improvement. If you’ve put too much on, dab your brush on a paper towel and then wick some of the excess paint in the rim out with the dryer brush. Chromed or painted, your wheels will have a much more convincing look.
One more use for black washes is on grilles. I suppose I should tell you that I like the PolyScale acrylic in ‘oily black’ for these. Again, I emphasize the ability to manipulate a dried acrylic wash especially on chromed pieces. This is particularly handy for grilles when the really fine details can’t possibly be accentuated unless you clean up after the wash. I just use a clean toothpick and burnish off the dried paint from areas that I want the chrome to show through. So don’t hesitate to thin down that paint when you are attending to these types of places on a vehicle

![]() Realistic
tires
Realistic
tires
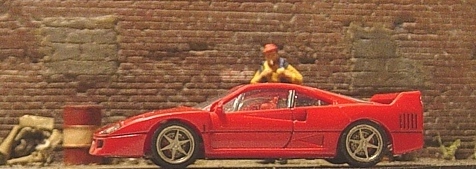
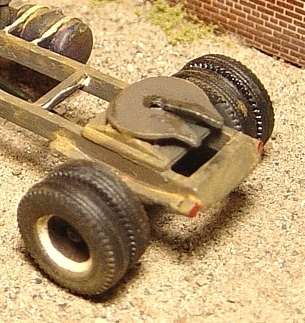
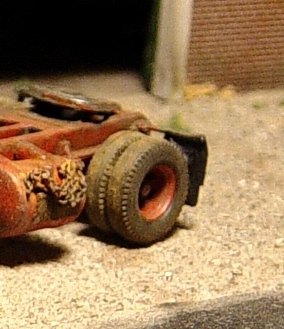
Since we’re down at the wheels, take a look to see if there are mold seams on your tire treads. A light sanding solves this problem and actually gives the tread a slightly different texture than the sidewalls which comes out quite nice.
|
 |
|
New looking tires |
"Dressed" tires |
I’ve bought some rather expensive artist chalks to improve my models and they are great for making weathering powders but not necessary. There’s a lot of products used everyday that can be substituted for them. The simplest and most effective change one can make with powders is again on the tires. I use a Q-tip dipped in gasoline and slightly wet the rubber tire (don’t soak it, it will dissolve most rubbers used in modeling). Then a light dusting with something from the wife’s compact, tobacco ashes, foot powder or what I like to use, cement, will knock the sheen off of the rubber. If a less used look is desired merely wipe off what you have dusted on and the powder will remain in the crevices of the tread pattern.
These are just a few of the many easy and cheap techniques that will make the subtle changes to your models that may be what is needed to turn a good model into a great model.